Making chocolate decorations is one of our favorite things to do! They’re not only entertaining to produce, but they’re also delicious! Tempered chocolate works better for chocolate gifts, but chocolate wafers can be used for most projects if you don’t want to temper chocolate. You’ll need to look at these in the event that you’ve been attempting to take a shot at some great chocolate embellishments for your cakes or sweets.
Best chocolate for decoration
We’ll be using tempered chocolate at 86 degrees Fahrenheit for these chocolate decorations, which is the ideal working temperature. To temper my chocolate in the oven, we use a chocolate thermometer and a silicone mixing cup. For these small projects, quick and simple is the way to go! You can use compound chocolate instead of tempering chocolate if you don’t want to temper it. Guittard is a brand that we like. If you choose to paint your candy melts, you can use chocolate food coloring or pre-colored candy melts like those sold by Wilton. Chocolate cannot be colored with standard food coloring.
Correlation between genuine chocolate and compound chocolate
Since real chocolate contains cocoa spread, it should be tempered prior to being utilized in molds or for embellishments. In the event that you don’t adjust the chocolate, it will be delicate and tasteless, and it will rapidly lose its structure. At the point when we nibble into real chocolate, it softens at around body temperature level and has an incredible taste and snap.
Compound chocolate, (for example, Wilton candy liquefies) doesn’t contain cocoa margarine and is frequently referred to as covering chocolate. It may have a fat substitution that shouldn’t be tempered. It has a lot higher softening point, is more affordable, and is more steady in a hot climate. The disadvantage is that it doesn’t have a similar flavor as real chocolate.
Different decorating methods
Different decorating methods
Method-1
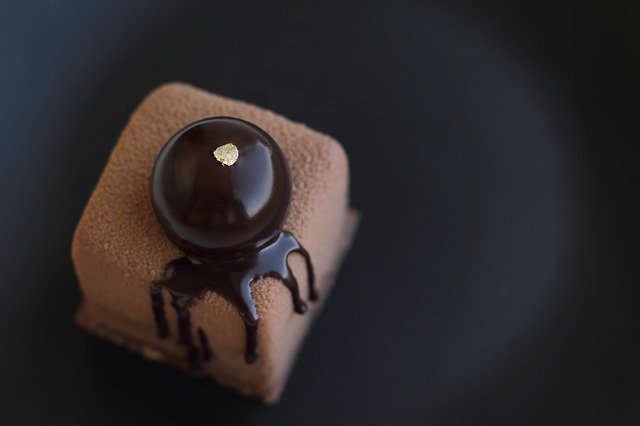
Chocolate sphere cakes are everywhere right now. From colored swirls that mimic planets to gleaming metallics atop contemporary designs, there’s something for everyone. Making a chocolate sphere as a topper can be amazing. You’ll require tempered chocolate and a silicon sphere form to create chocolate spheres. We can use melting wafers and a silicone sphere mold instead of tempering chocolate if you don’t want to go through the trouble of tempering it. The melting wafers are trapped in the silicone mold and won’t come out. The silicone mold is one of our favorites because the spheres are very shiny.
- At 86°F, pour your tempered chocolate into your acrylic mold and use a bench scraper to remove any excess chocolate.
- To clear any air bubbles, tap the side of the mold.
- After 30 seconds, remove the chocolate from the molds and then the shells with your bench scraper.
- Turn the mold upside down on parchment paper for 10-15 minutes, or until the chocolate is firm but not liquid.
- To make a clean edge on the spheres, scrape off the excess chocolate.
- Refrigerate the chocolates for 10 minutes, or until they are easily removed from the mold. If you allow the chocolate to freeze, it will develop condensation stains.
- Place a cake pan on top of a hot water tank.
- Melt the edges of each sphere slightly, then use gloved hands to force them together.
- Remove excess chocolate and allow that to fully set.
- You can now paint or use your spheres as it is.
Method-2
The addition of chocolate sails to the tops of your cakes creates a stunning display.! It can be done using parchment paper.
- On a sheet of parchment paper, spread a thin layer of tempered chocolate of temperature 86ºF.
- To secure the parchment paper’s edges, gather them on one side and clip them together.
- Refrigerate the parchment for 10 minutes, or until it is solid.
- Carefully remove the parchment paper from the back of the chocolate without breaking.
- If the chocolate edges are rough, use a knife to smooth them out.
- The beautiful sail is now ready to be put on top of your cake.
- We use TMP copper and a little Everclear to add some basic metallic splatters to the sail.
Method-3
These chocolate cups were one of the first things we learned to make in pastry school, and We loved how they turned out! Chocolate mousse, ice cream, and other small cute sweets can be served in a variety of innovative ways. Water balloons, parchment paper, and tempered chocolate are all you’ll need. We don’t want to use traditional balloons because they’re too large and would make escaping the chocolate difficult.
- To keep the water balloons in place, blow them up with air and tie the ends together.
- Place your cups on a cookie sheet lined with parchment paper.
- Pour your tempered cocoa into a big mixing bowl for ease of dipping the balloon. The temperature should be about 86ºF, don,t exceed that point.
- Dip the balloon in chocolate before putting it on parchment paper.
- After you’ve dipped all of your balloons in chocolate, put the pan in the fridge for 10 minutes to make that stuff, or until the chocolate has set.
- Break the balloons away from the chocolate with a pin.
- Eliminate the inflatable from the chocolate, and your cups are presently fit to be loaded up with delicious treats!
Method -4
On top of cupcakes, these honeycomb chocolate decorations look fantastic! Everything you’ll need is some tempered chocolate or melted candy melts, as well as some bubble wrap (washed).
- Tempered chocolate or liquid sugar melts might be utilized to cover your air pocket wrap.
- Using your fingers, smooth out the cocoa. The gaps will be more visible if you spread them thinner.
- Shake the air pocket wrap to help the chocolate settle and smooth out from it without breakage.
- Refrigerate their pocket wrap for at least 10 minutes, or until it is fully solid.
- You can now remove your honeycombs from the bubble wrap and break them into bits and use it to garnish your desserts.
Method-5
On top of your cakes, chocolate butterfly decorations look incredible than other decorations! You would then be able to paint the internal parts with more shaded dissolved chocolate after the outline has been created. All you’ll require is our free chocolate butterfly design, some acetic acid derivation or material paper, a piping bag, and a thick book.
- Fill a piping bag halfway with tempered chocolate (86ºF). Remove the bag’s tip and cut it off. It should be around the size of a toothpick.
- Place your butterfly design on parchment paper or acetate and cover it with it. We taped it to a cookie sheet to prevent it from wriggling and make it easier to pick up from the sheet and it will give more neatness.
- Trace the design of the wings with your chocolate.
- Empower the chocolate to solidify in the fridge for 10 minutes.
- In the event that the wings have been gathered, cautiously separate them from the acetate. Crease the acetate into equal parts and spot it in a thick book.
- To make the body, place the wings on one or the other side of the wrinkle and line more chocolate in the middle of them.
- Refrigerate the chocolate until it solidifies then just it has a flawless look.
- Presently your butterflies are fit to be put on cupcakes or a cake.
Method-6
This dripping chocolate bowl centerpiece is perfect for a dessert table. On the inside, fill with whipped cream and fruit or ice cream and cookies and add more items according to your requirement! You will eat the bowl as well if you share the dessert.
- To hold a standard-sized balloon stable, inflate it and position it upside down in a bowl or cup.
- Cover the top of the balloon with plastic wrap.
- Pipe tempered chocolate or candy melts over the top of the plastic wrap with a piping bag.
- If some chocolate drips down the sides, that’s perfect.
- To set the balloon, place it in the refrigerator for 10 minutes.
- Carefully separate the balloon and plastic wrap from the chocolate.
- It’s now time to stuff your chocolate decoration with goodies!
You can embellish practically any pastry with chocolate. Brightening Cakes with Chocolate is snappy, simple and all you need is chocolate chips, a sheet of material paper, and something to pipe it with; either a Ziploc pack or on the off chance that you have one, you can utilize a frosting lose with a sharp tip (to be totally un-specialized).